Installing RioRey Director
Requirements
The following guide shows how to install the RioRey Director VM. Once you have downloaded a Director image from login.riorey.com, import it as an existing image using your hypervisor. If the option is available, select "Rocky Linux 9" as the image's OS.
In order to start the Director VM, you will need to meet at least the Minimum set of the following resource requirements. Minimum requirements will get the system up and running with no guarantees on performance. Our Recommended requirements will have enough resources for almost all expected use cases.
| Minimum | Recommended | |
|---|---|---|
| CPU Spec | x86-64-v3 (includes AVX, AVX2) | |
| CPU Count | 1 | 8+ |
| Memory | 4 GB | 16+ GB |
| Storage | 15 GB | 150+ GB of SSD-tier storage |
The default configuration of the RioRey Director VM image has 15 GB of virtual storage. If you want to increase the storage used by the VM, finish the rest of the installation, then shut down the VM. Following the procedures for your hypervisor, resize the image, then restart Director.
Configure Director
- Connect a console (graphical or serial) to the VM using your hypervisor and wait for its initial boot to finish. This may require you to start the VM if it hadn't already during the import procedure for your hypervisor.
- Eventually you should see a prompt for the localhost login. Log in using the default username and password:
user:
admin, password:admin123 - Once logged in you should see the splash screen showing the version of Director running on the VM and a few helpful commands:
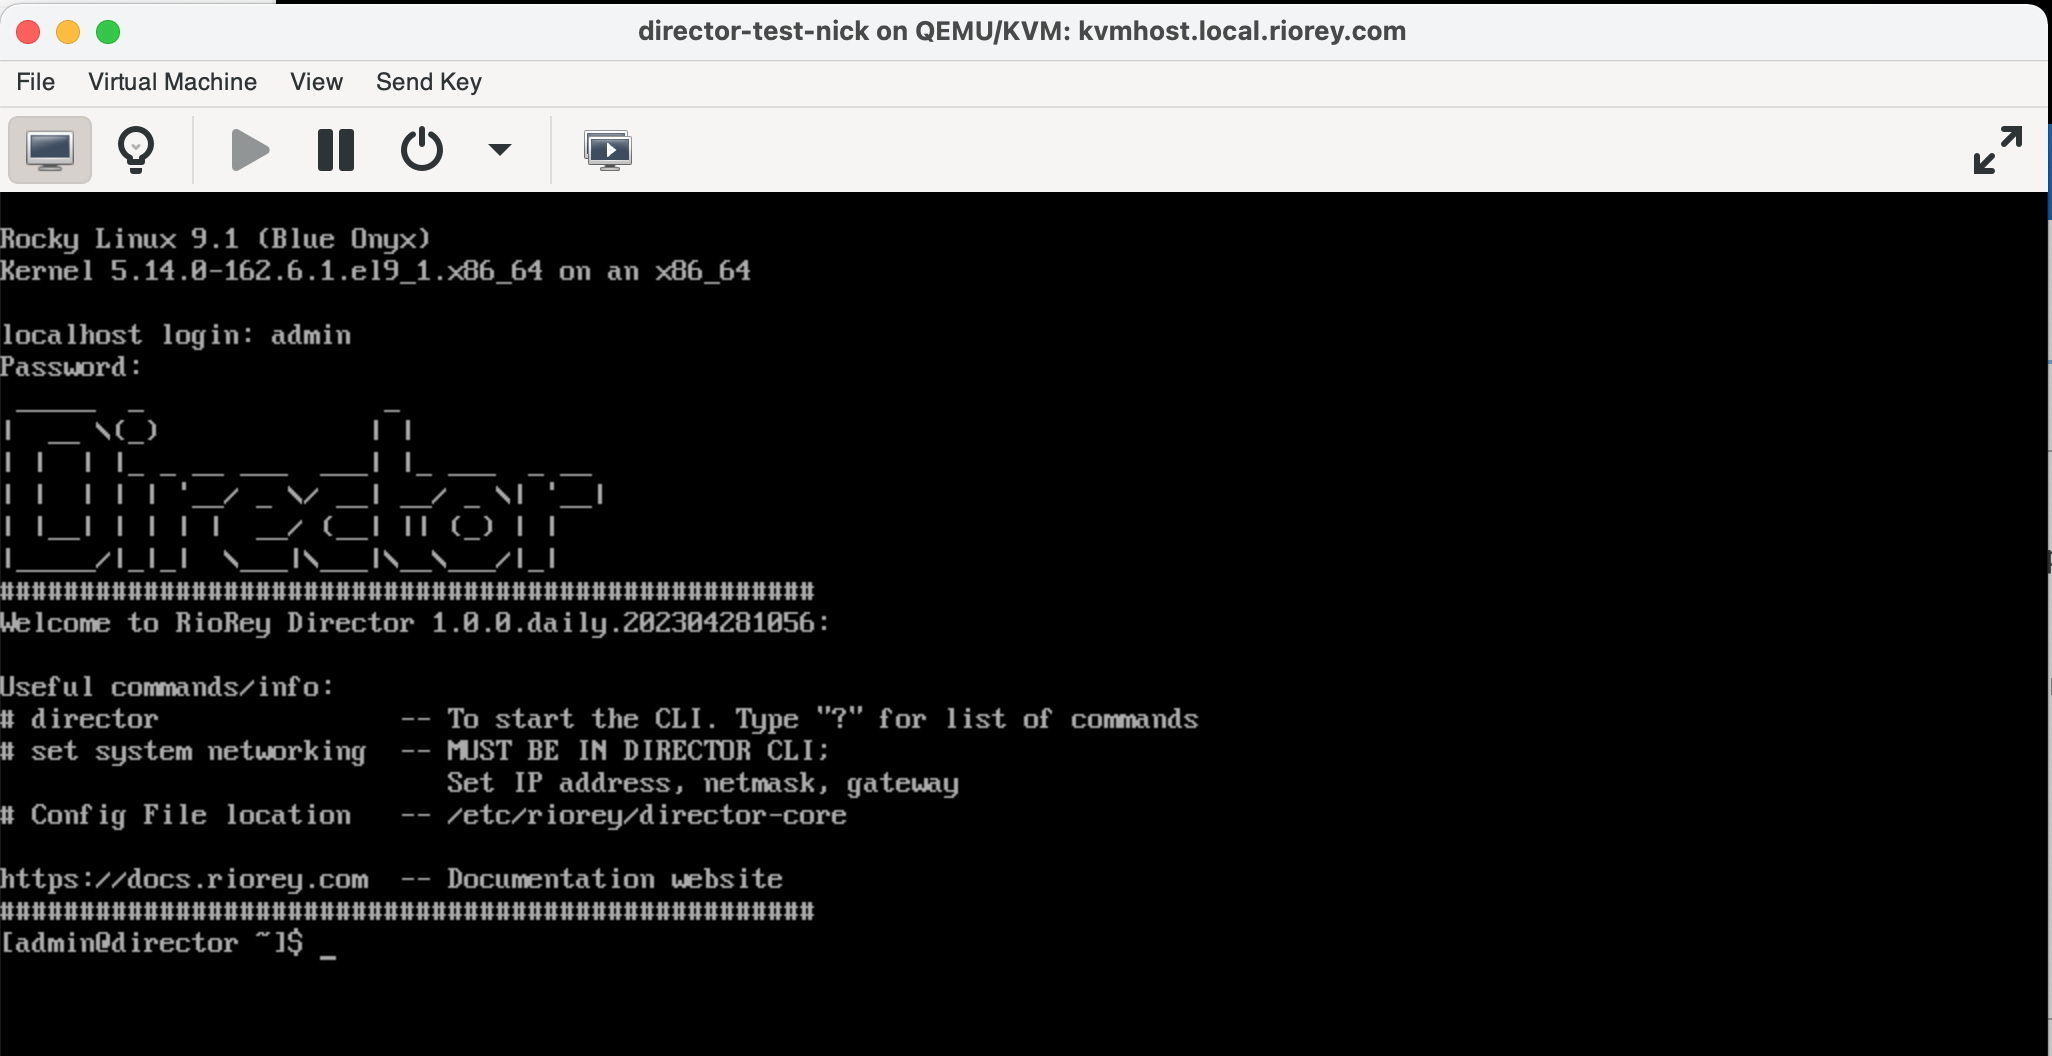
- Configure the IP address you intend to use for Director. Enter
directorinto the console, which will start the Director CLI. Once in the CLI, issue theset system networkingcommand and follow the instructions to reconfigure Director's IP (by default it will come up as 192.168.0.4).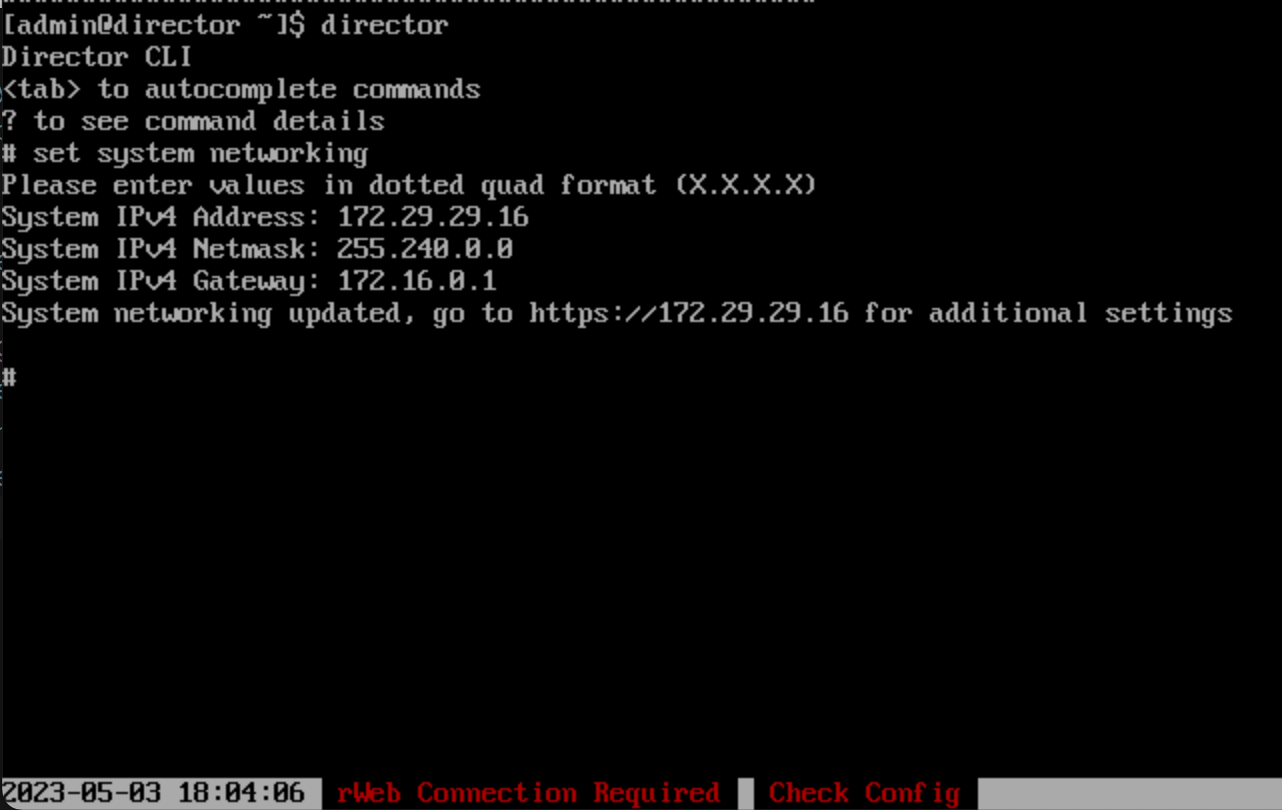
- Once configured, you can access the Director webui at the new IP address (as shown in the CLI prompt) for additional options such as NTP and Syslog servers, hostname, and DNS configuration. You can also change the IP address directly there. At a minimum, you should log into the webui and change the webui password and adjust your NTP servers.
If you change the hostname of the system, you should reboot the system prior to proceeding with the remaining steps. You should also ensure that the selected hostname will match your currently set IP within your DNS search domain. If it points to a different system in your network, you may experience problems.
- The default log in and password for webui is also
adminandadmin123. You should change this using the Password tab.
The webui login is not the same as the admin user account which is used to login in over console or ssh. Webui password changes will only affect the webui login. You should separately change the ssh user password using the passwd command once logged in over ssh.
- While logged into the webui, go to the Networking tab and change your NTP Servers (by default this will point to our provided NTP servers at rtime0.riorey.com and rtime1.riorey.com). This accepts a comma separated list of either hostnames or IPv4 addresses. If using hostnames with resources specific to your network, you may need to update the DNS Servers and DNS Search entries to point to your local DNS servers and domain.
- You should now ssh into Director using the
adminuser at its new IP address as opposed to using the hypervisor console connection. Once logged in, from the shell enterchronyc trackingto verify that you have good NTP time synchronization. You can also enterchronyc sourcesto check that you are getting responses from each server you have entered. Below is output showing the current NTP source as our rtime0.riorey.com server, and the current status for both rtime0 and rtime1: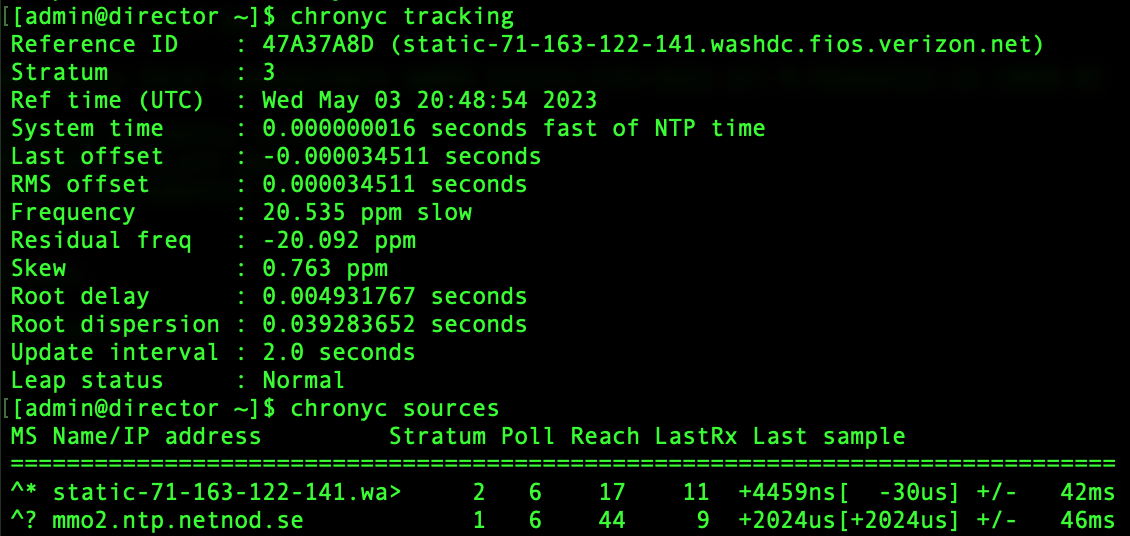
- In order to use Director, you will need to license it. Contact RioRey Sales (sales@riorey.com) in order to get a license key, or if you have been provided one already proceed to the next step.
- Once you have a license key, get back to the Director CLI, and issue the
set system license <KEY>command, where<KEY>is the license key provided by RioRey Support. This key will be easier to copy paste in if you are using ssh versus the hypervisor console. If no errors are generated by the command, your license should be valid. You can confirm by issuing theshow system licensecommand and checking its output:director# show system license
License State | Valid
Bandwidth | 10000 mbits
Period | 2023-05-17
External IP | 198.51.100.22 - Once the license is confirmed valid, you can configure Director for your use case. Refer to the Director Configuration Guide or the quickstart reference for further steps.