Hardware In Place Upgrade
You can upgrade rWeb in place if you do not want to purchase new disks or transition to a VM. This will require hands on maintenance for a hardware rWeb, as well as a USB on which to load the new boot image.
This process will delete data! While it will preserve IP addresses and serial numbers, other configuration and data will be lost. Be sure to have fully downloaded a backup to a safe location.
Preconditions
Ensure you have these items on hand first:
- A separate computer for formatting the USB (desktop or laptop, OS of your choice)
- A copy of the rWeb 10 hw-upgrade.iso on the computer you're using for formatting
- A USB drive (4GB minimum, 32GB maximum)
- Phillips head screwdriver (#1 size)
- VGA Monitor and cable
- USB Keyboard
- Your rWeb backup
Procedure
- If not already done, ensure you have a backup (full or config only) generated and saved off from your existing rWeb.
- Format the USB with the rWeb 10 hw-upgrade.iso file.
Formatting Instructions
- Using balenaEtcher
- Using `dd`
- Using `cp`
This is our recommended procedure for formatting the USB. Alternative instructions for other tools are included on the other tabs, but any tool that can make a bitwise copy should be sufficient.
- balenaEtcher is a cross-platform application for flashing OS images to USB drives. If acceptable for your work environment, download it for your OS on the separate computer.
- Insert your USB drive into your computer.
- Run balenaEtcher, select the rWeb 10 hw-upgrade.iso, then the USB drive, and flash the USB. This process should take about 15 minutes.
- Remove the USB once it is ready and proceed to the next steps.
- Insert your USB drive into your computer.
- Locate it using
lsblk(or usingdiskutil listif on MacOS).
sdb      8:16   1  14.5G  0 disk
└─sdb1   8:17   1   2.3G  0 part /media/exampleuser/USB
umountthe device.
umount /media/exampleuser/USB
- Copy the rWeb 10 hw-upgrade.iso over to the USB with
dd.
sudo dd if=rweb.10.0.0.release.2-hw-upgrade.iso of=/dev/sdb bs=8M status=progress oflag=sync
/dev/sdb is the USB location on our particular test setup. Make sure you double check the location to use on your local system before executing this command!
- Unplug the USB, it is ready to use.
- As an optional sanity check, plug the USB back again and run
lsblk, the following should show up:
sdb      8:16   1   7.3G  0 disk
└─sdb1   8:17   1   2.4G  0 part /media/exampleuser/rWeb-10
- Insert your USB drive into your computer.
- Locate it using
lsblk(or usingdiskutil listif on MacOS).
sdb      8:16   1  14.5G  0 disk
└─sdb1   8:17   1   2.3G  0 part /media/exampleuser/USB
- Copy the rWeb 10 hw-upgrade.iso over to the USB using
cp.
cp rweb.10.0.0.release.2-hw-upgrade.iso /dev/sdb; sync
/dev/sdb is the USB location on our particular test setup. Make sure you double check the location to use on your local system before executing this command!
- Unplug the USB, it is ready to use.
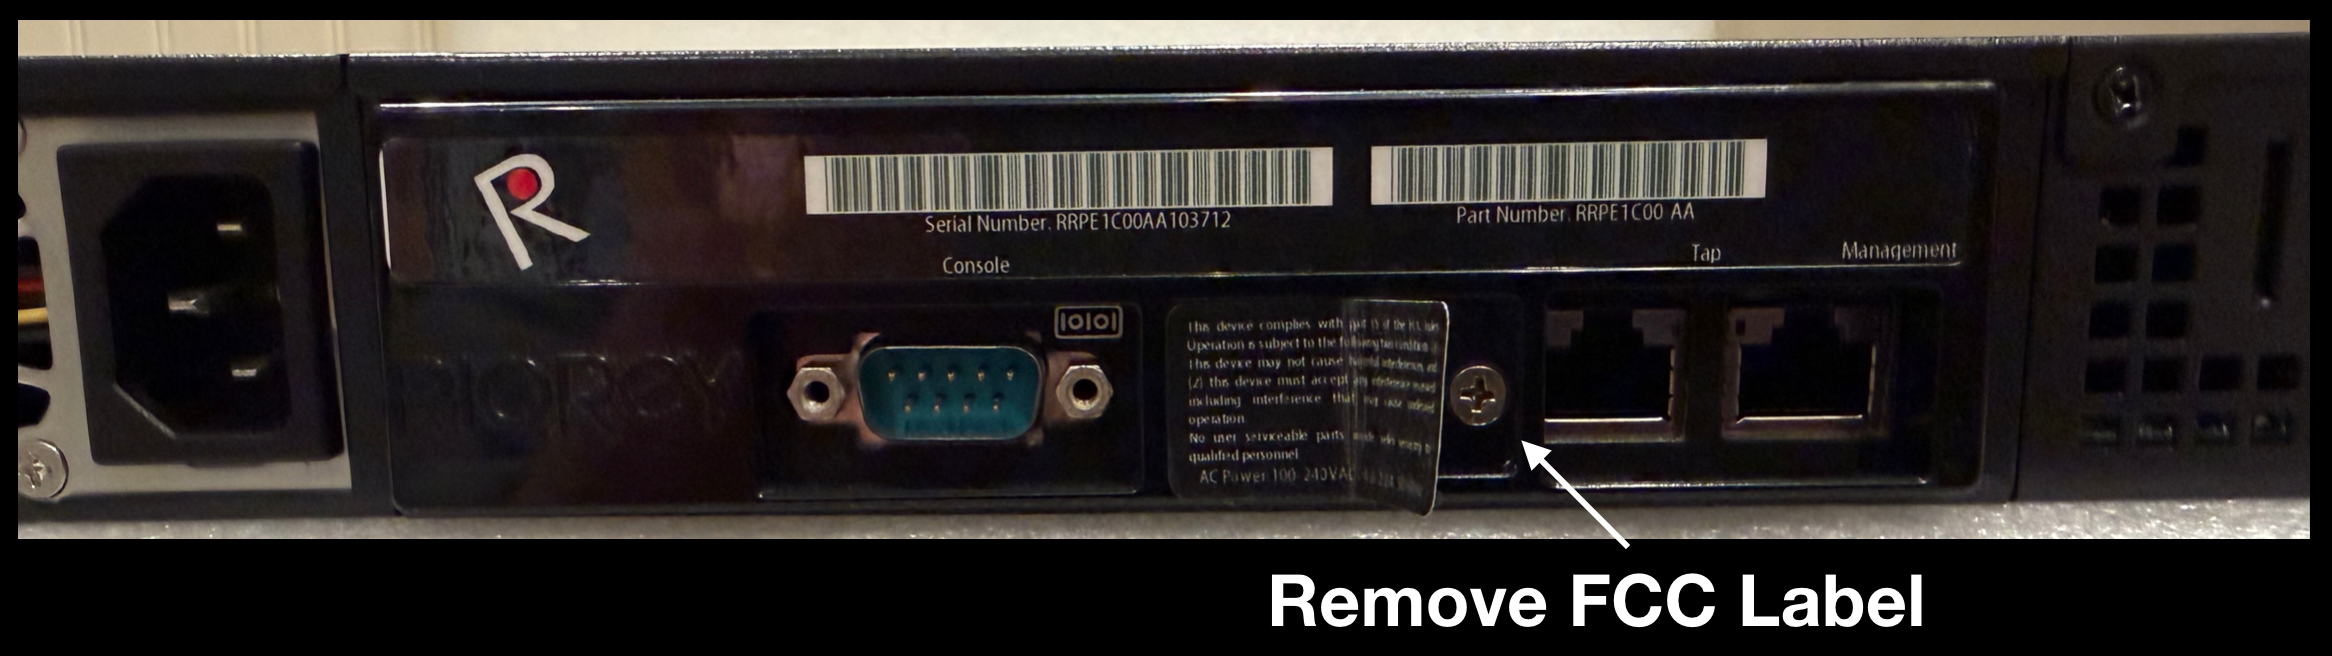
- Remove the FCC label covering the back plate screws as shown.
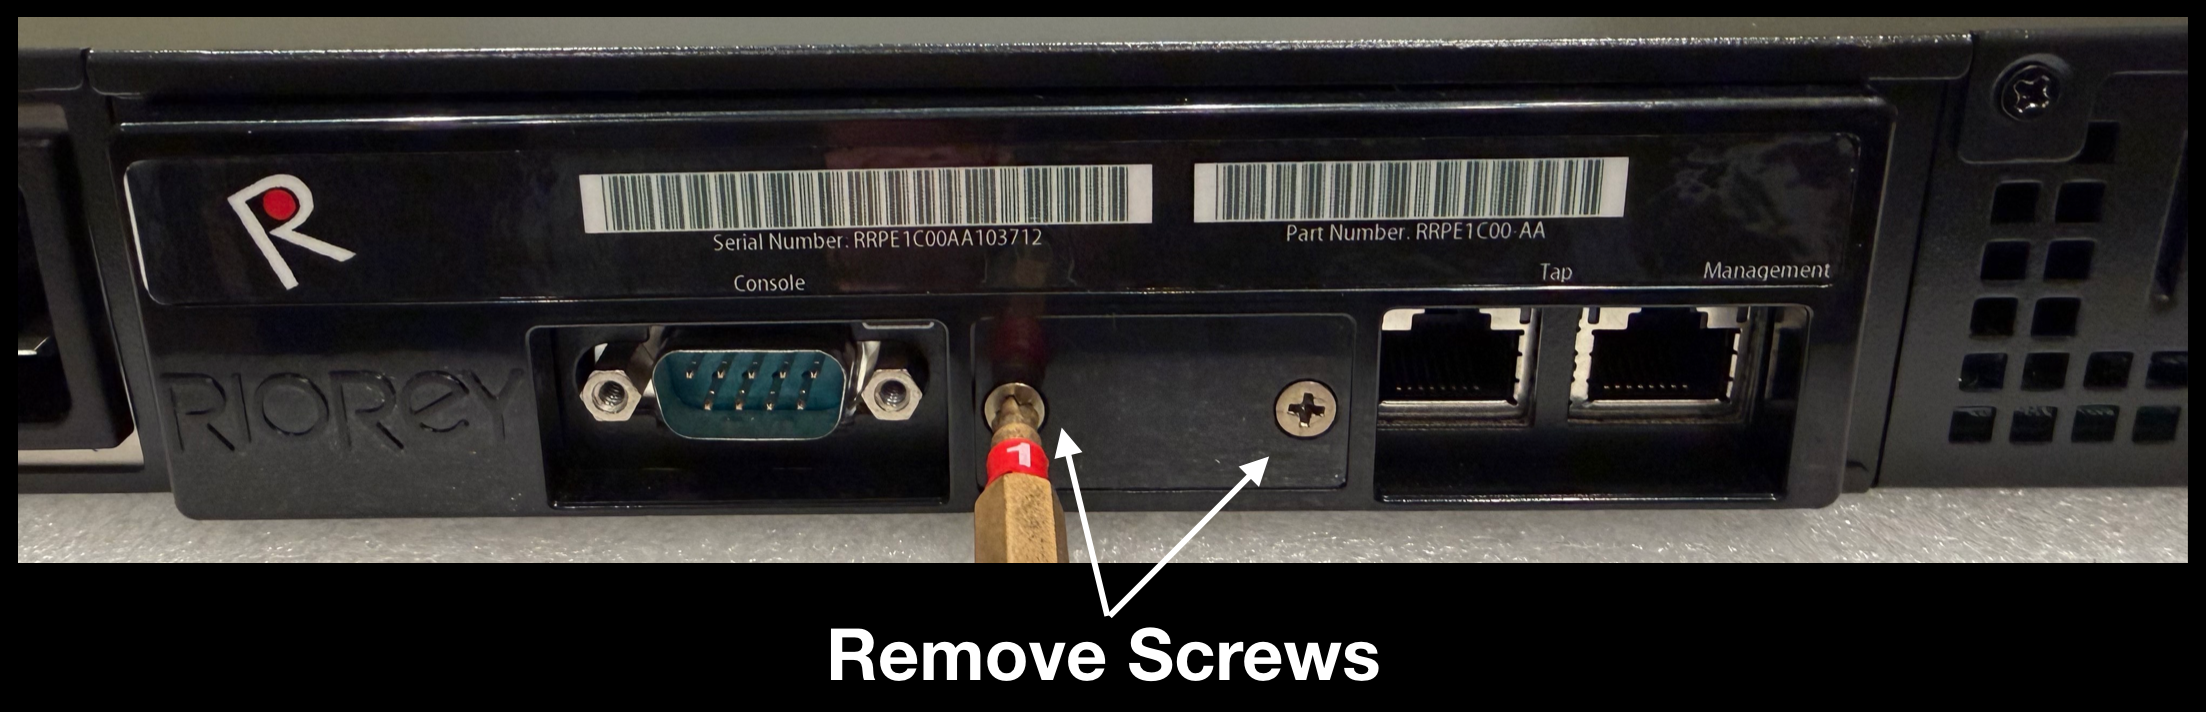
- Remove the two screws using the #1 screwdriver as shown, then remove the back plate.
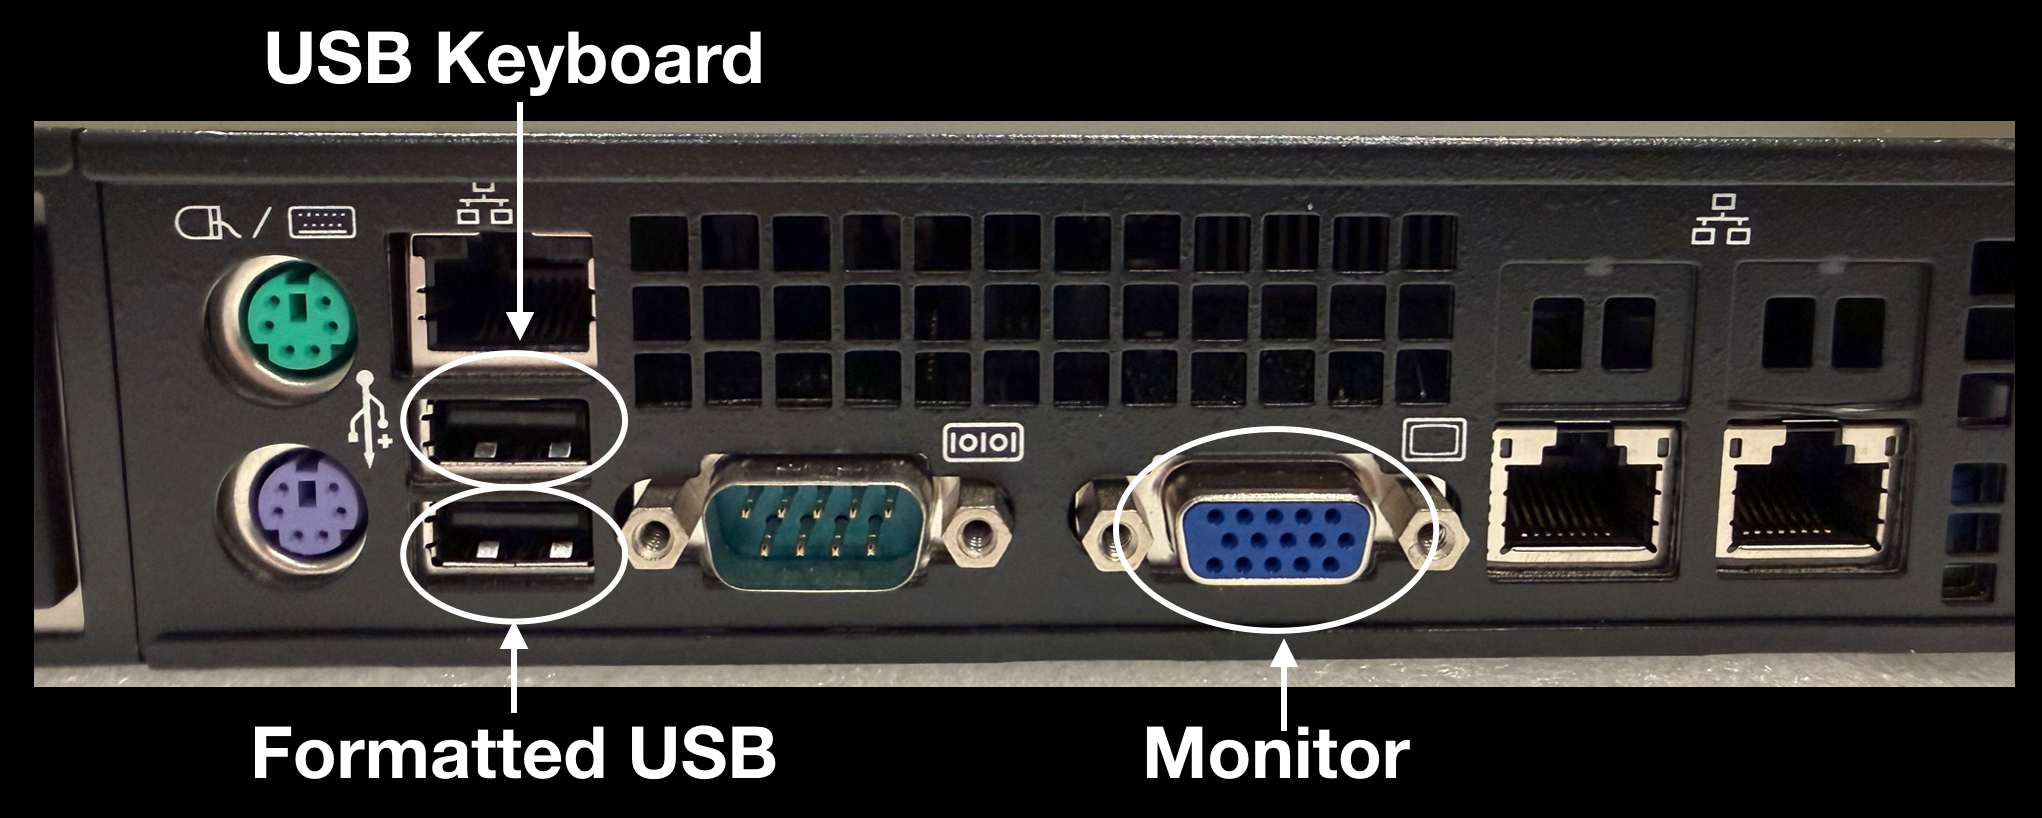
- Plug in the monitor, keyboard, and formatted USB as shown. You should be able to see and interact with an rWeb command prompt.
- Reboot rWeb (enter
rebooton the command prompt) and hit F11 on boot to enter the boot loader. - Type in password
klofro.
If you type in the password three times incorrectly, you'll need to reboot and start over from the previous step.
- Select the USB as the boot device.
- When you see the screen asking if you want to "Install rWeb 10", hit enter, and wait for the installation to complete.
If the system reboots instead of showing you this prompt, check that the USB drive is in the bottom of the two ports, then start over from step 6.
- Hit enter when the screen says the installation is complete.
- The system will reboot right away to run initial setup script.
- The system will reboot again, after which it is ready for use (you'll see the rWeb command line).
- Unplug the USB, keyboard, and monitor, and replace the back plate.
- Log in with the default user and password (
admin/admin123) and reload your backup. Your browser may refuse to connect to rWeb because of HSTS. In this case you'll need to clear your browser's HSTS settings for rWeb temporarily in order to restore the backup. - Load the latest copy of your license manually or use the "pull and apply" option from the rWeb licensing section.