VM In Place Upgrades
This page contains instructions for upgrading both KVM and VMWare rWebs in place to 10.0.
danger
This process will delete data! While it will preserve IP addresses and serial numbers, other configuration and data will be lost. Be sure to have fully downloaded a backup to a safe location.
Preconditions
Ensure you have these items on hand first:
- Your rWeb backup
- A copy of the rWeb 10 vm.iso uploaded to your hypervisor
KVM rWeb In Place Upgrade
rWeb can be upgraded in-place by booting from the VM upgrade ISO. It will require an interactive console to confirm the upgrade. The following instructions are for the libvirt Virtual Machine Manager interface.
- If not already done, ensure you have a backup (full or config only) generated and saved off from your existing rWeb.
- Shut down the virtual machine.
- Click “Show virtual hardware details”.
- Click “Add hardware” at the bottom.
- Check “Select or create custom storage”.
- Select the vm-upgrade.iso image of rWeb 10.0.
- Set device type to be “CDROM” and bus type to be “SATA” and hit finish.
- Under Boot Options check “SATA CDROM1” and make it the first on the Boot device order list.
- Hit apply and power on the virtual machine.
- Hit enter when the screen shows "Install rWeb 10" and wait for it to finish.
- After the installation is finished, the VM will power itself down.
- Reconfigure the VM, removing the cdrom drive.
- Power on the system to let it run the initial setup script.
- The system will reboot once, after which it is ready to use.
- Log in with the default user and password (
admin/admin123) and reload your backup. Your browser may refuse to connect to rWeb because of HSTS. In this case you'll need to clear your browser's HSTS settings for rWeb temporarily in order to restore the backup. - Load the latest copy of your license manually or use the "pull and apply" option from the rWeb licensing section.
VMWare rWeb In Place Upgrade
rWeb can be upgraded in-place by booting from the VM upgrade ISO. It will require an interactive console to confirm the upgrade. The following instructions are for the ESXi web interface.
- If not already done, ensure you have a backup (full or config only) generated and saved off from your existing rWeb.
- Shut down the virtual machine.
- Select the VM.
- Click "Actions", then "Edit Settings".
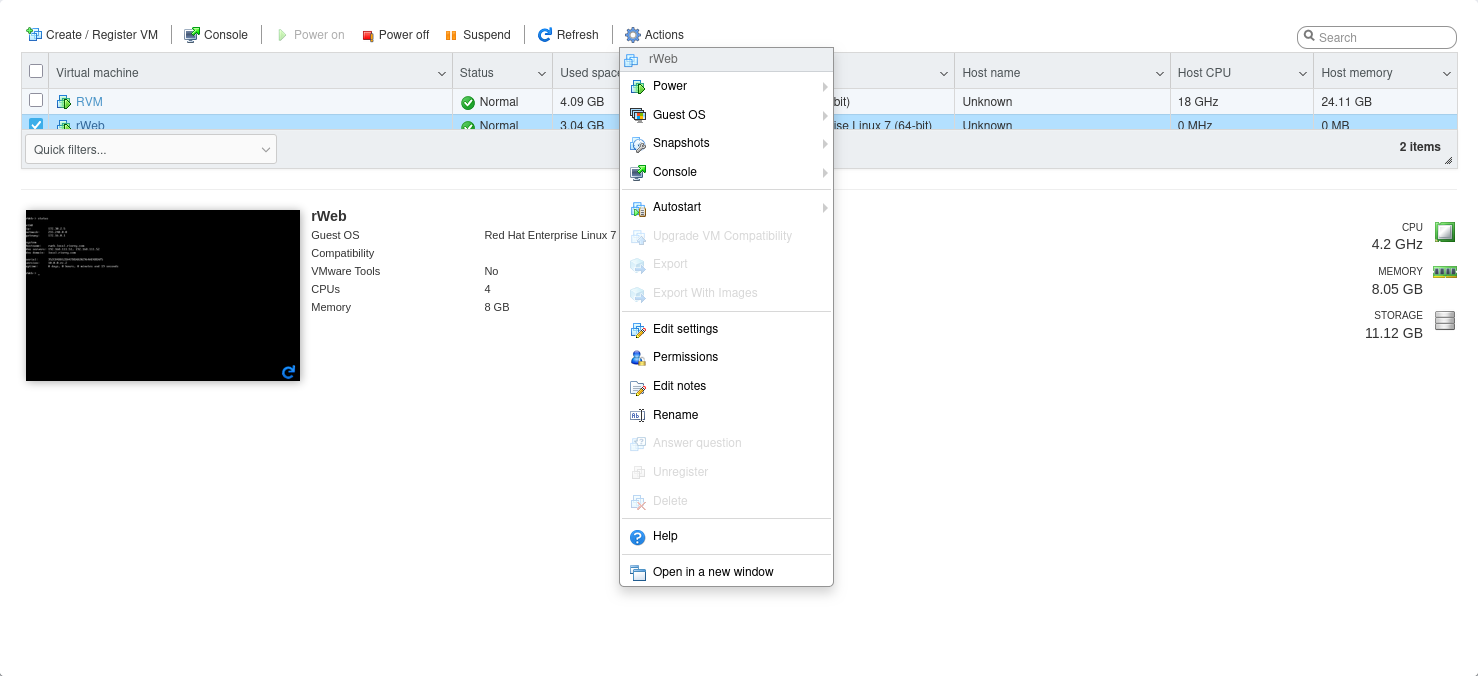
- Click "VM Options", then expand "Boot Options".
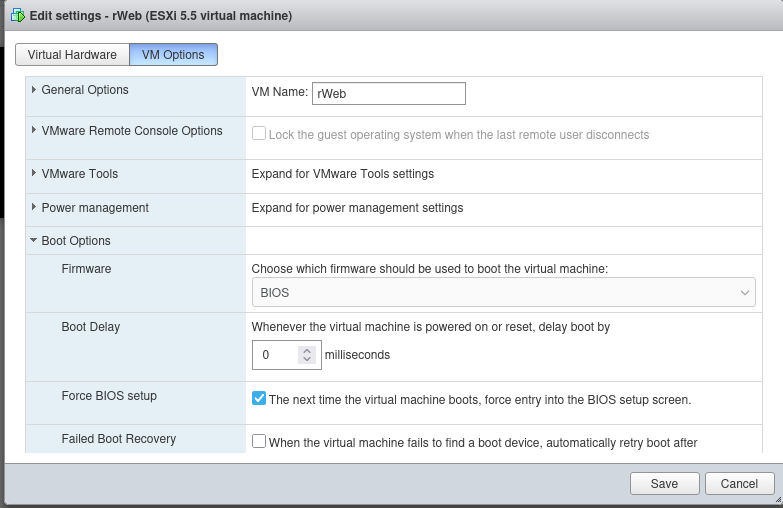
- Make sure "Force BIOS setup" is enabled.
- In "Virtual Hardware", select "Add Another Device" and add a CD/DVD Drive.
- Select datastore ISO, then select the vm-upgrade.iso image of rWeb 10.0.
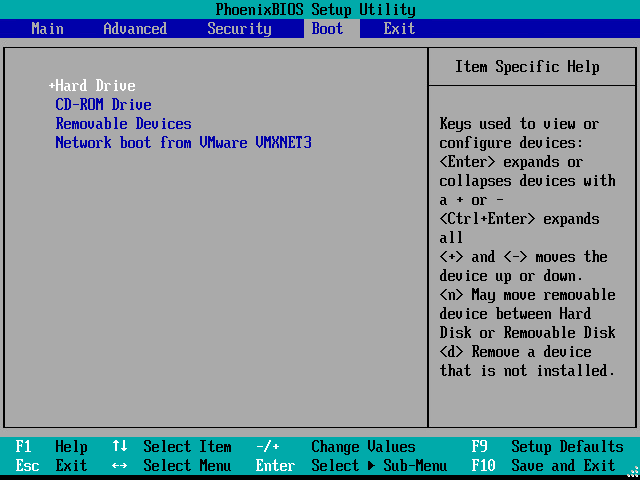
- Turn on the VM, waiting until you see the BIOS setup screen.
- Under Boot Options make sure the CD/DVD is first on the order list, then Save and Exit.
- Hit enter when the screen shows "Install rWeb 10" and wait for it to finish.
- After the installation is finished, the VM will power itself down.
- Repeat the process starting from step 3, this time making sure the Hard Drive is first in boot order.
- Power on the system to let it run the initial setup script.
- The system will reboot three times, after which it is ready to use.
- Log in with the default user and password (
admin/admin123) and reload your backup. Your browser may refuse to connect to rWeb because of HSTS. In this case you'll need to clear your browser's HSTS settings for rWeb temporarily in order to restore the backup. - Load the latest copy of your license manually or use the "pull and apply" option from the rWeb licensing section.