Allow Lists
RIOS 6.2.0 or greater is required to use global block/allow list and all block list exception functionality.
rWeb can store both source and destination allow lists. Using these allow lists, known good traffic can be exempted from all normal filtering to prevent accidentally dropping the traffic by a false positive identification as attack traffic.
Source Allow List
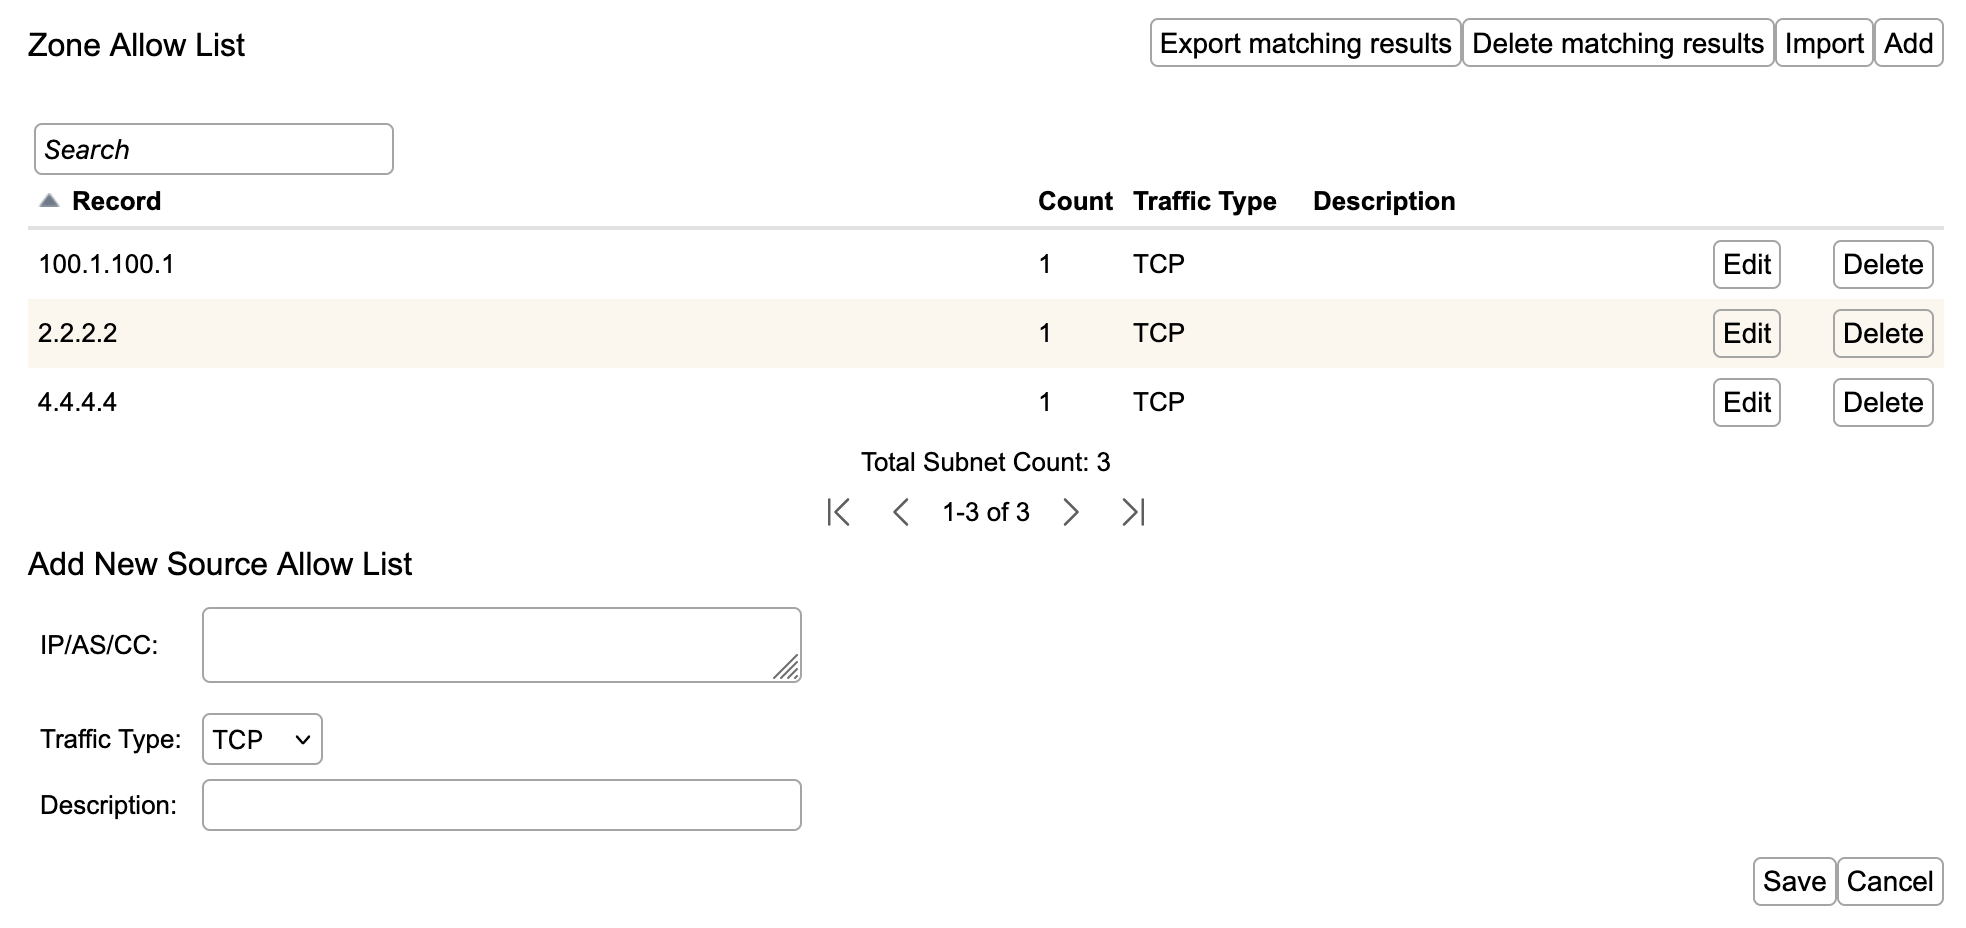
Under this section, you can Export, Import, Add, Edit, and Delete source allow list entries. The Search bar can be used to search your current set of allow list entries and filter down to a subset of entries.
Shared List entries, if made, will be visible here but can only be changed by an admin level user. Exported allow lists will not include shared list entries.
Exporting and Importing Source Allow List Entries
Export matching results allows you to export all entries matched by your current search query to either an xml or csv file. This file can be imported (here, or in other zones) using Import.
Import can use either the xml or a csv format. If using csv, the pop up will ask you to map which columns will be used for values, allowing you to import csvs from non-rWeb sources. When importing, you have the option to Erase all existing lists. This will remove all entries you have permission to control (e.g. non-admin users cannot remove global entries) and inserting everything from the file.
Batch Source Allow List Deletion
To facilitate deleting large numbers of allow lists, Delete matching results will delete every entry matched by the current search query.
Adding Source Allow List Entries
You can Add one or more addresses to the source allow list, using one entry per line. Entries can be made in a number of ways. You can:
- Enter a single IP to allow list. The system will automatically add a /32 for IPv4 or /128 for IPv6 addresses.
- Enter a subnet to allow list. IPv4 addresses are limited to /16 and smaller.
- Enter an Autonomous System to allow list. This is entered by ASXXXXX, where the X's are the ASN you are allowing.
- Enter a Country Code to allow list. This is the two letter representation of the CC you are allow listing.
You can also select the type of traffic to allow through: All, TCP, UDP, or ICMP.
Optionally, you can enter a description. Hit Save when complete.
Adding Global Source Allow List Entries
Global allow list entries will allow list the source address across all zones, unless overridden by more specific settings in the zone.
Global allow list entries can only be made in the Default Zone. Enter a allow list entry as described above.
In order to add an entry, all devices mapped to this zone must have enough source allow list capacity to hold all of the subnets created by the entry. An AS or CC entry will contribute multiple subnets at once towards this limit. To see your device's limits, go to Administration->Devices and click on the Zone Management tab.
Destination Allow List
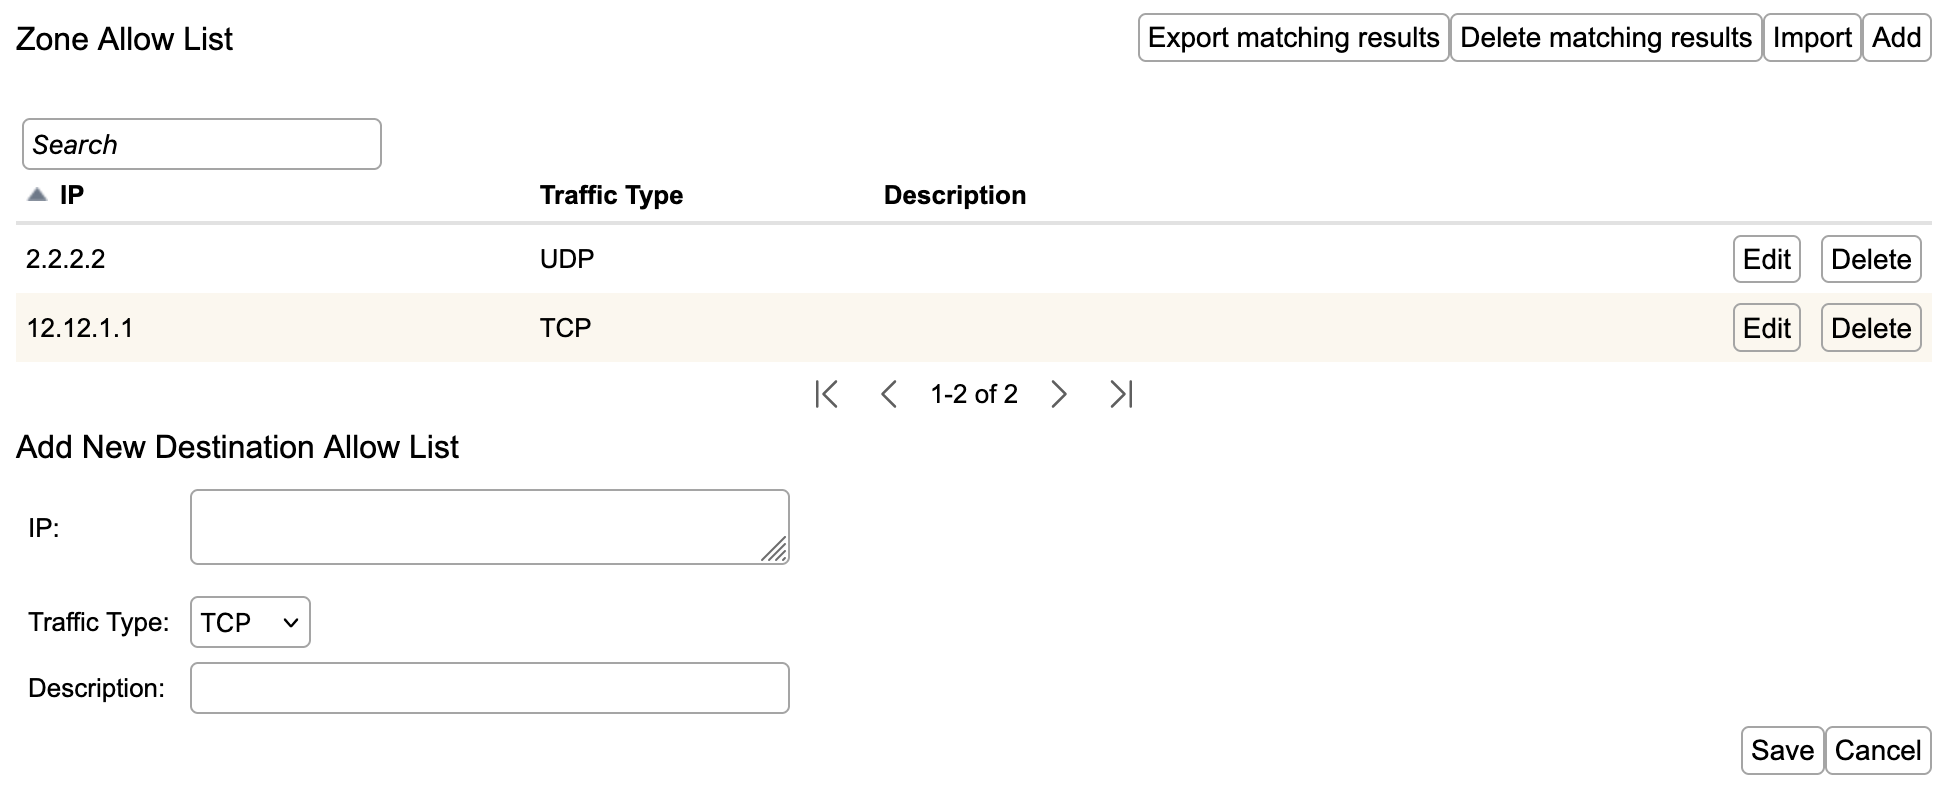
Under this section, you can Export, Import, Add, Edit, and Delete destination allow list entries. The Search bar can be used to search your current set of allow list entries and filter down to a subset of entries.
Destination Allow List entries only have meaning if they also match the zone's routes. If you make a Destination Allow List for a prefix outside of the Zone, it will accept the entry but devices will ignore the value as it can never actually be applied.
Exporting and Importing Destination Allow List Entries
Export matching results allows you to export all entries matched by your current search query to either an xml or csv file. This file can be imported (here, or in other zones) using Import.
Import can use either the xml or a csv format. If using csv, the pop up will ask you to map which columns will be used for values, allowing you to import csvs from non-rWeb sources. When importing, you have the option to Erase all existing lists. This will remove all entries you have permission to control and inserting everything from the file.
Importing a destination allow list is usually only meaningful if the list was originally produced by the Zone. See the callout advice in Destination Allow List.
Batch Destination Allow List Deletion
To facilitate deleting large numbers of allow lists, Delete matching results will delete every entry matched by the current search query.
Adding Destination Allow List Entries
You can Add one or more addresses to the destination allow list, using one entry per line. Entries can be made in a number of ways. You can:
- Enter a single IP to allow list The system will automatically add a /32 for IPv4 or /128 for IPv6 addresses.
- Enter a subnet to allow list. IPv4 addresses are limited to the zone routes used, which are /16 or smaller.
You can also select the type of traffic to allow through: All, TCP, UDP, or ICMP.
Optionally, you can enter a description. Hit Save when complete.
In order to add an entry, all devices mapped to this zone must have enough destination allow list capacity to hold all of the subnets created by the entry. To see your device's limits, go to Administration->Devices and click on the Zone Management tab.
If you add a Destination Allow List entry outside of the zone's routing prefixes, it will be ignored for filtering decisions but still use configuration capacity.