Steps to Configuring a Group and Zone in rWeb
Before configuring your Groups and Zones, please read the following guides to determine your overall configuration strategy:
In order to successfully configure a Group / Zone in rWeb, the user must complete the steps below:
Step 1- Add a Group
Go to the Top Menu > Zone Control
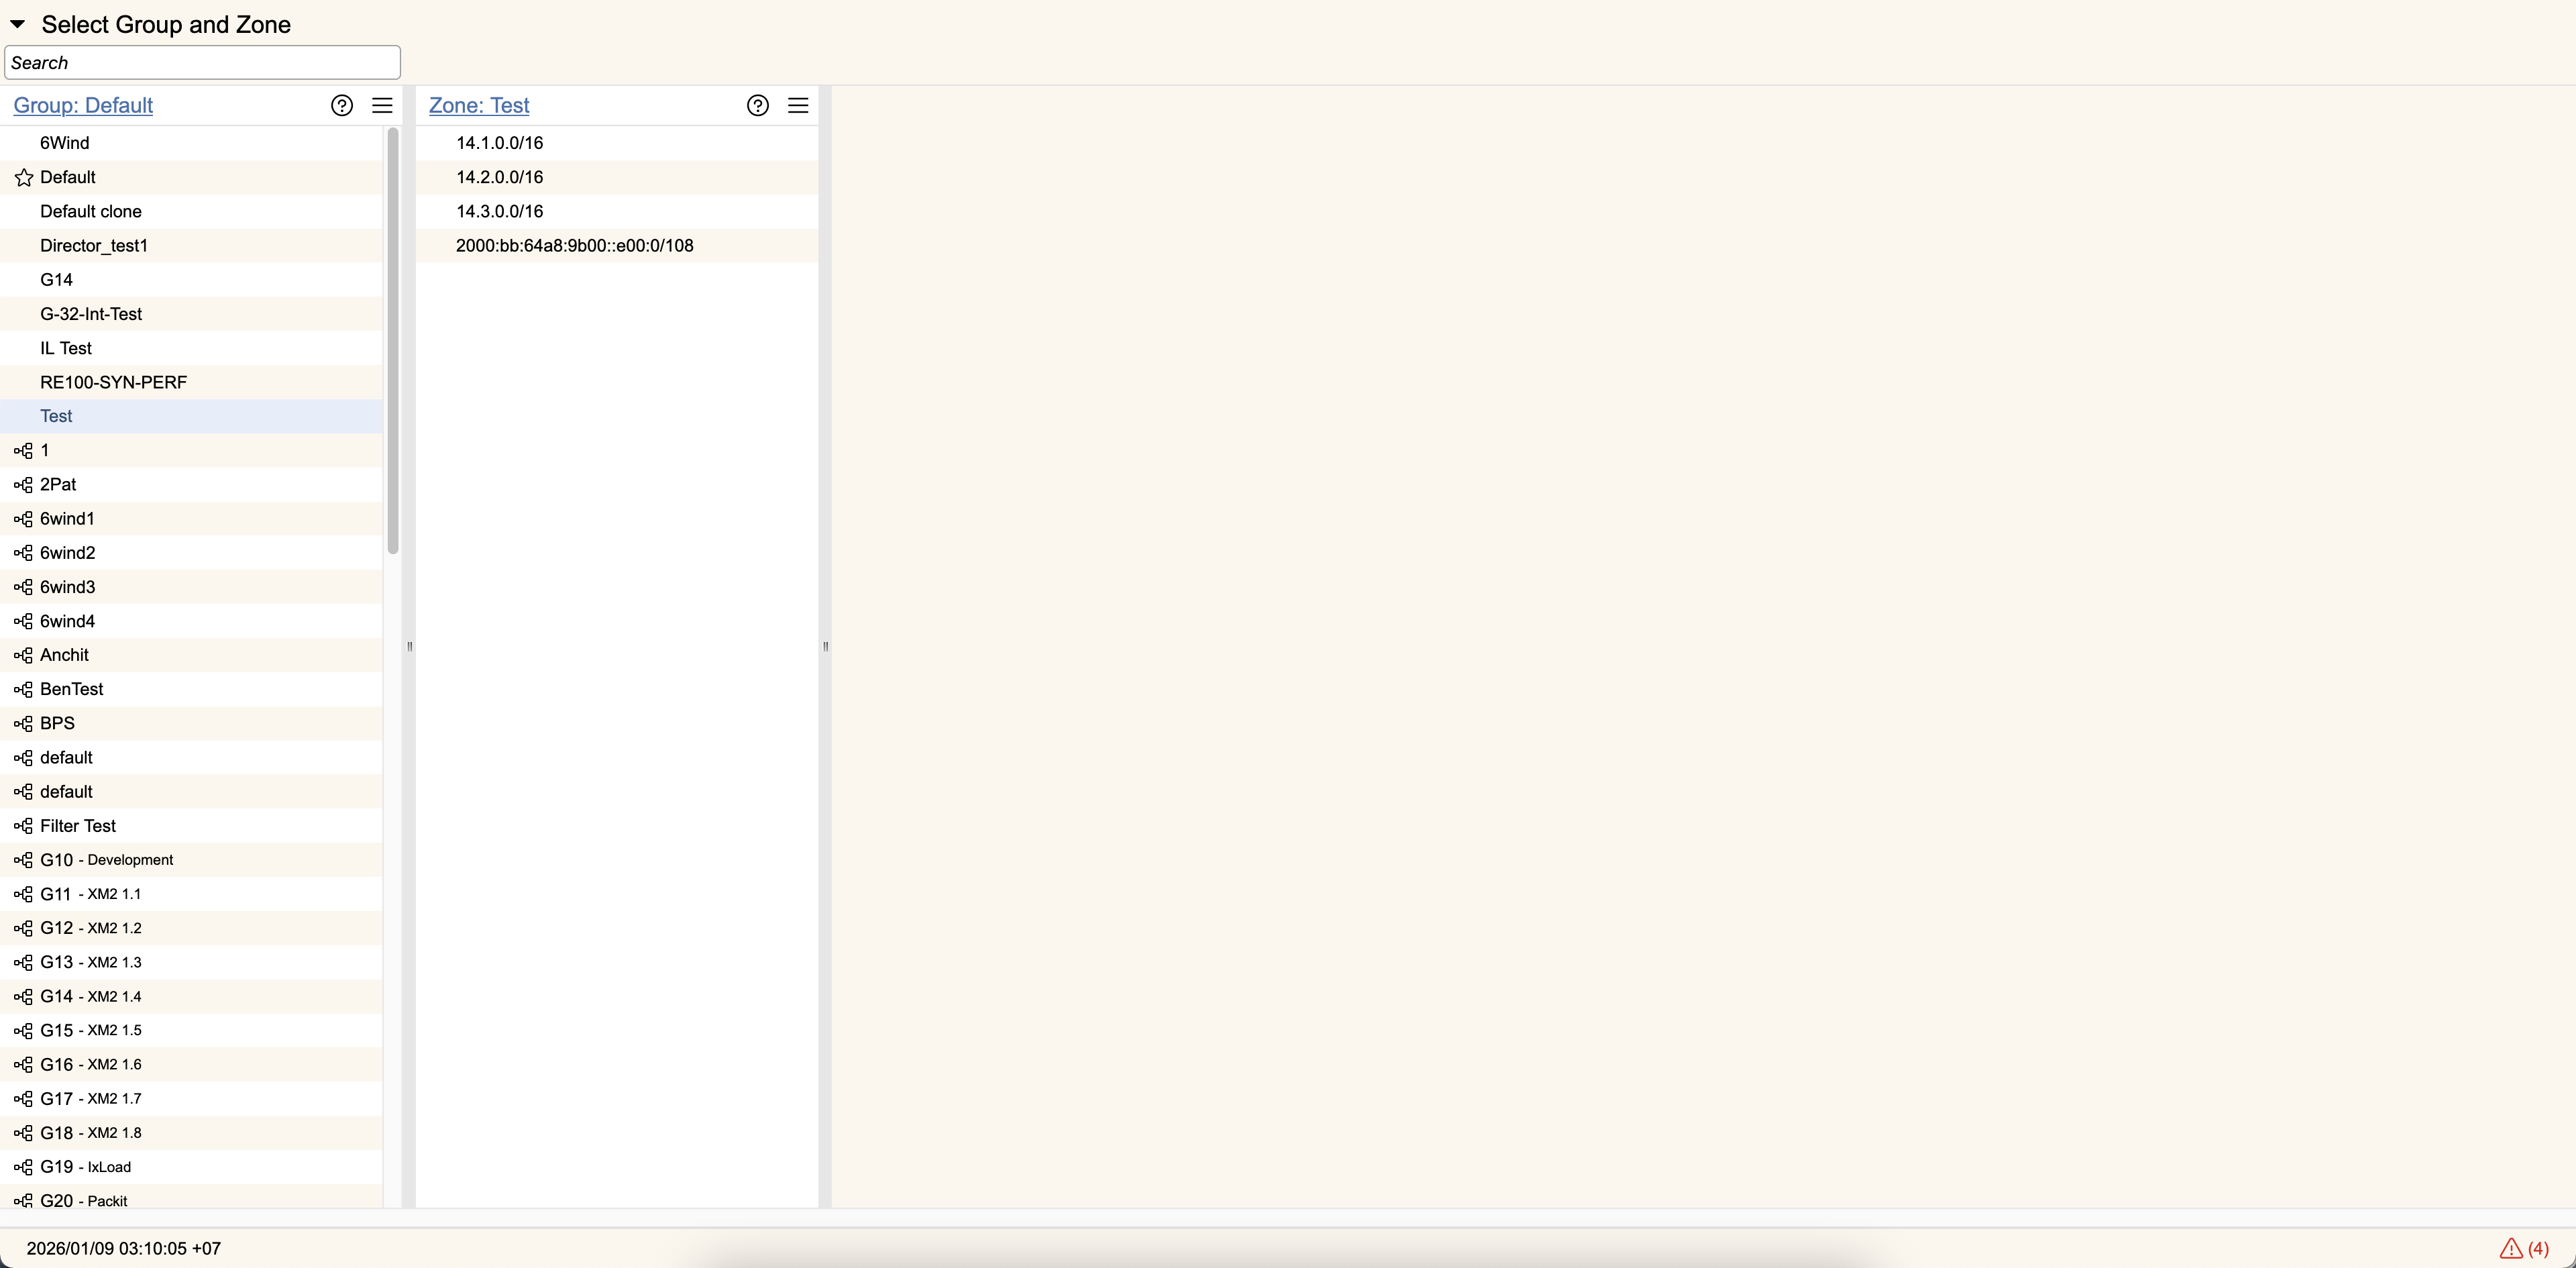
The "Group and Zone" list contains all existing user-defined Groups and Zones. Groups on this screen can be identified by the icon next to their name.
To add a Group to the "Group and Zone" list, select the three bar icon then select "Add Group". The "Adding Group" entry box will appear in the next column on the right.
Supply the new group with a name and description (optional). Save when done. The group name will now appear in the "Group and Zone" list. If the new group is created within in an existing group, it will be visible once that group is selected.
Step 2- Add a Zone to an existing Group
Go to the Top Menu > Zone Control
The "Group and Zone" list contains all existing user-defined groups and zones.
To add a zone to the "Group and Zone" list, highlight the desired Group in the list to which the zone will be added. Click the three bar icon, then select "Add Zone" and an "Adding Zone" entry box will appear in the next column on the right.
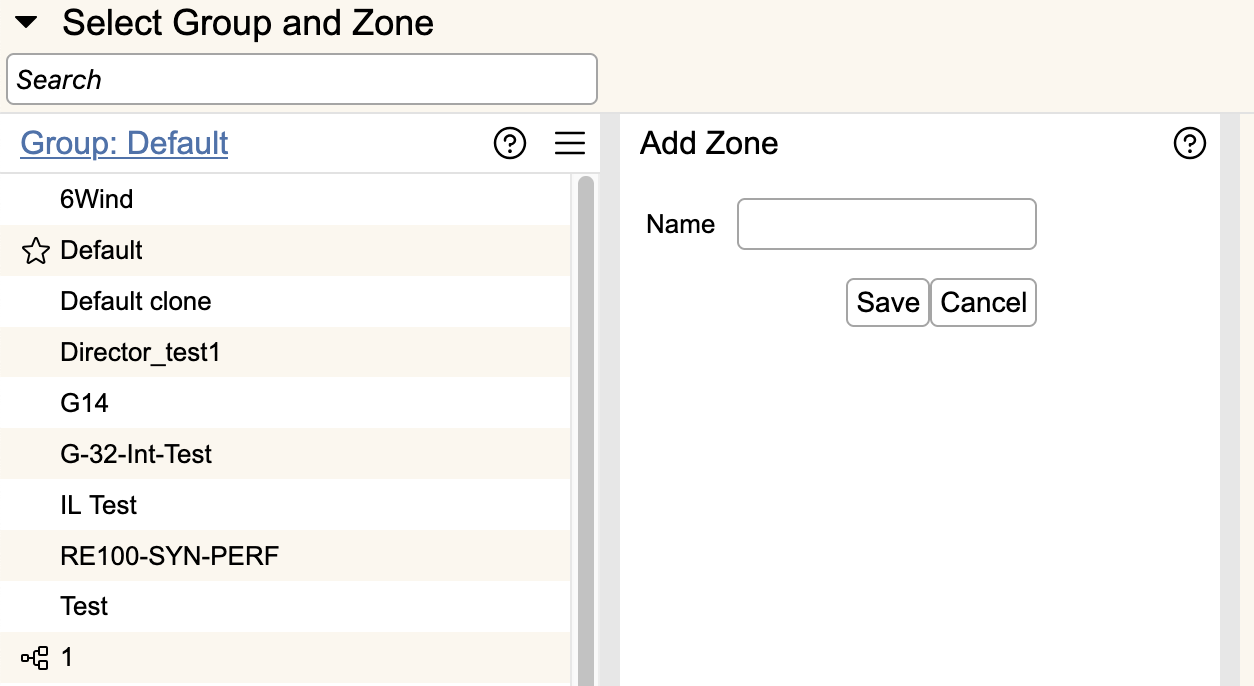
Supply the new zone with a name and Save when done. The zone has been created and its name will appear in the "Group and Zone" list under the specified Group.
The user MUST configure routing for an added zone (see step 3). Newly added zones do not have assigned default IP(s)/Subnet(s). The user must set up routing information for a zone in order for it to be active in rWeb.
Step 3- Setting Up Routing For the Zone
In rWeb, routing is managed on a per zone basis. Each zone has a dedicated Zone Control Panel with a Routing tab for that zone. Newly added zones do not have assigned default prefixes/subnet and, in cases where Group devices are not configured, RioRey device(s). After adding a zone to the "Group and Zone" list, the user must define the zone's routing information in order for the zone to become active in rWeb. You can add routing two ways: directly on the Zone Control screen or on the Zone Routing Tab.
Newly added subnets must adhere to the zone's parent group subnets. If you try to add a zone subnet that is not a proper subnet for the group, the operation will fail.
Adding Routing on the Zone Selection Page
To get to add subnets directly, go to Zone Control in the Top Menu.
Navigate to the desired zone, which will open a Zone Column. This will show all subnets currently associated with the zone.
You can use the three bar icon to add, edit, or remove subnets for the zone.
Adding Routing on the Routing Tab
To get to a zone's Routing Tab, Go to Zone Control in the Top Menu.
In the "Select Group and Zone" list, highlight the desired zone. Once highlighted, click the three bar icon and select Zone Routing to go to the Zone Routing Tab.
In the Routing tab, the user can add IPs / Subnets to a zone within the Zone Subnets section.
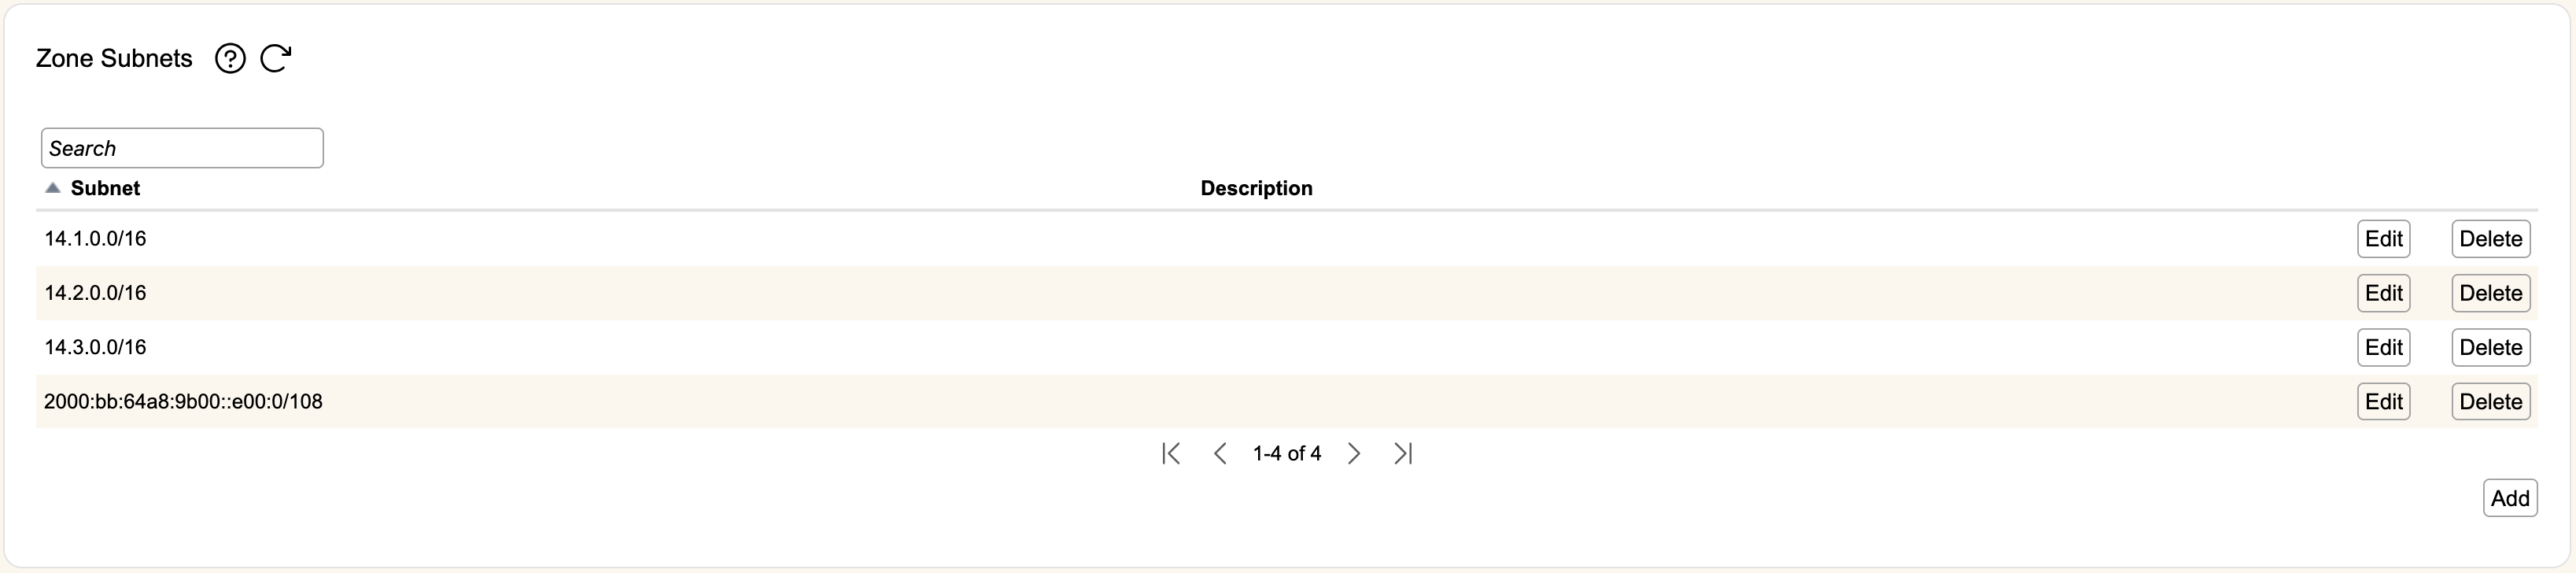
To add IPs / Subnets, Click Add at the bottom right of the table to reveal the “Add Subnet” entry below.
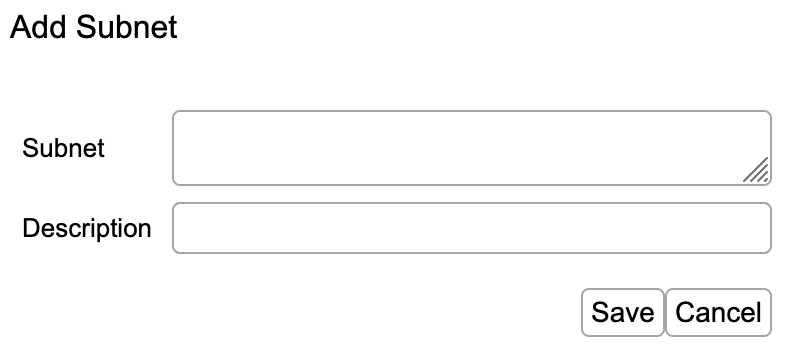
Enter the desired IP / subnet in the above highlighted box and add description (optional). You can add multiple subnets at once, separated by comma or newline.
Entries without a specified subnet mask will be treated as /32 for IPv4 and /128 for IPv6. Save when done.
If this operation in successful, the IP / subnet will populate in the Zone Subnet list.
Step 4- Configure Devices
If the group that owns the zone is configured to use group devices, the zone should already be associated with those devices and no further action is required.
Otherwise, you will need to manually associate devices with this zone. Navigate to the zone's routing tab as described in Adding Routing on the Routing Tab above.

The Zone Devices table is where RioRey device(s) can be added to the Zone. Click Add button at the bottom right of the box to reveal the “Map device to zone” pop up menu below the table.
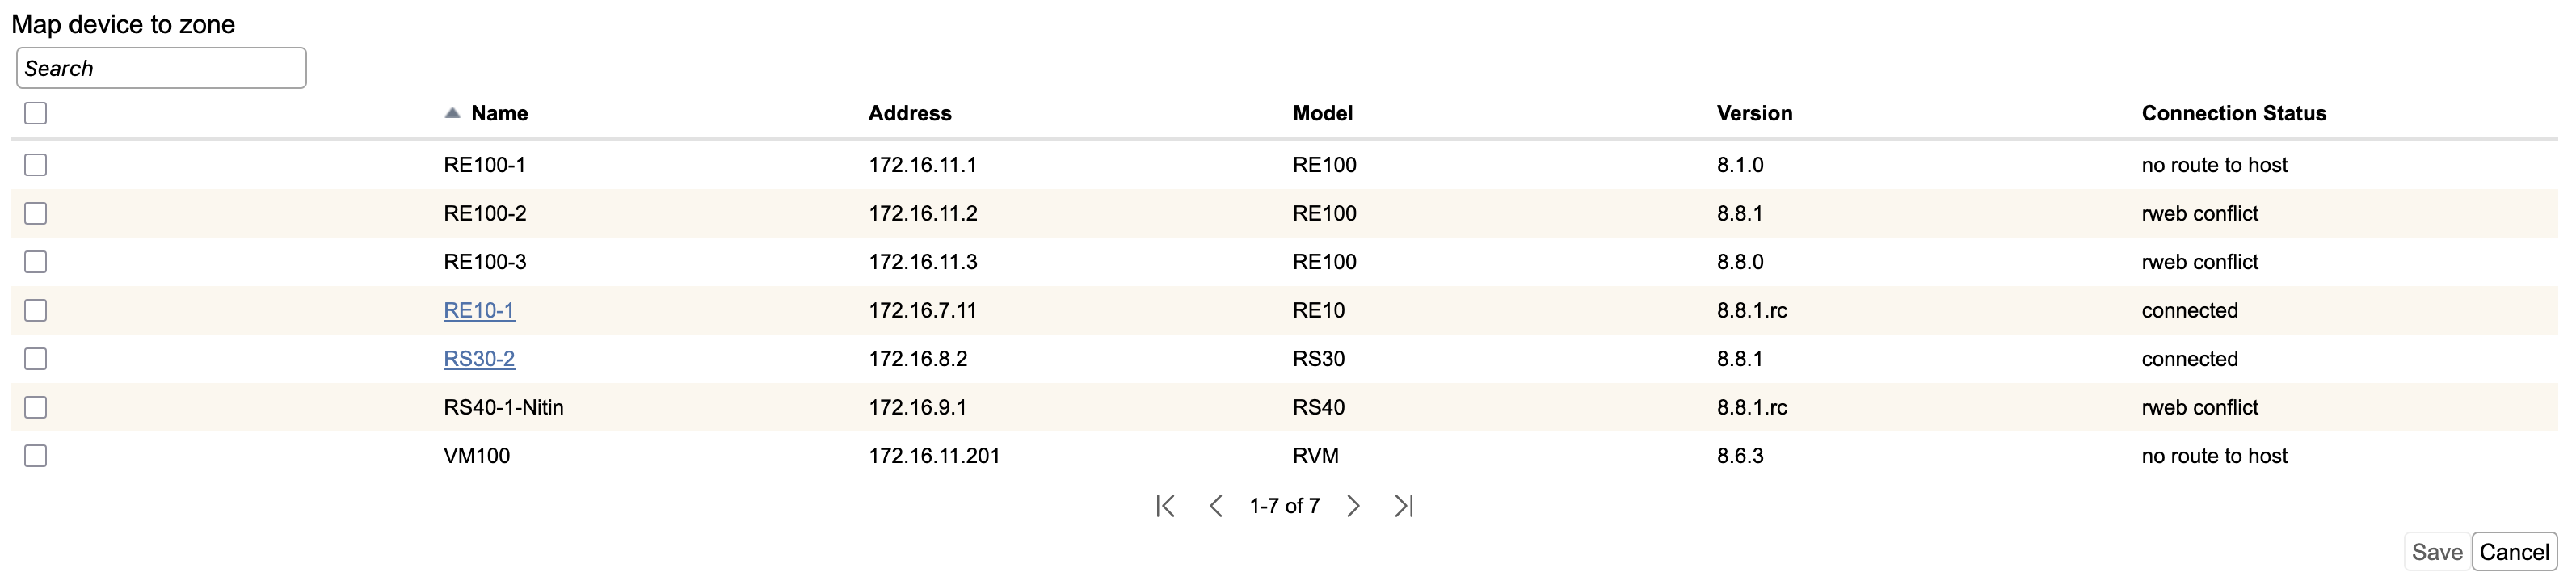
All available RioRey device(s) that are not already associated with this zone will be displayed in the “Map device to zone” pop up menu.
Select the desired device using the checkboxes on the left and click the Add button. You can add more than one device at a time by selecting multiple checkboxes. Clicking the title bar checkbox will select all available devices.
The selected device(s) will now populate in the CZone Devices table and will enforce all mitigation rules applied to the subnets within this zone.
Making changes to this table requires the device permission. Even when a device is assigned to other zones, it cannot be deleted from the “Default Zone.”